Quicker is a WooCommerce addon that allows fast, customizable product management. With the new product addon, you can add products efficiently, including configurable options like toppings or variations. This guide will help you set up products using Quicker. Here’s how to do it:
#1 Install and Activate Quicker:
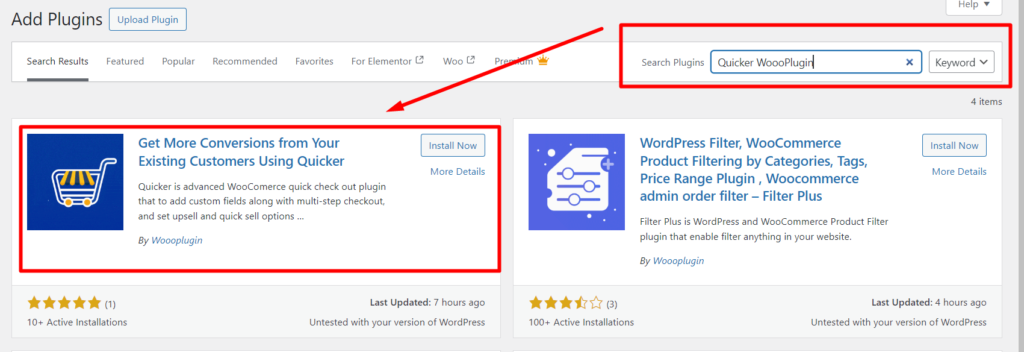
First off, make sure Quicker is installed from your WordPress dashboard. Now Navigate to Plugins > Installed Plugins and activate Quicker.
#2 Access Product Setup:
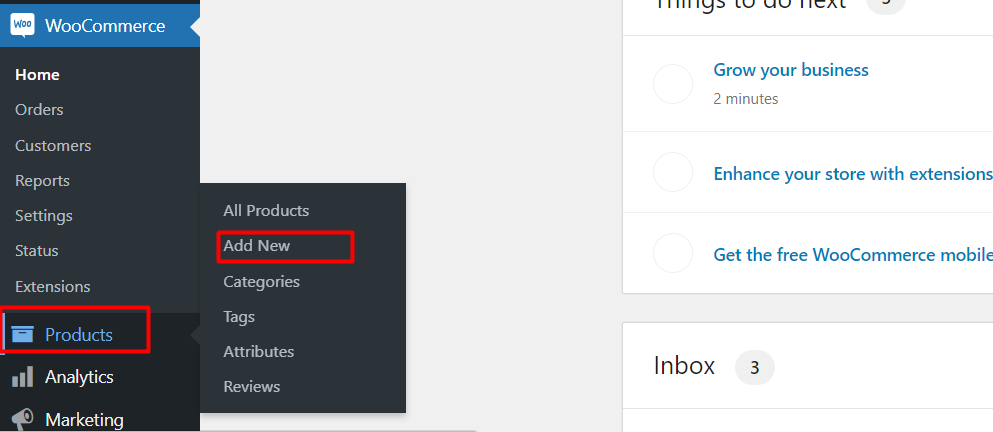
Now go to Products > Add New from your WordPress dashboard. There, enter the product name and description as usual.
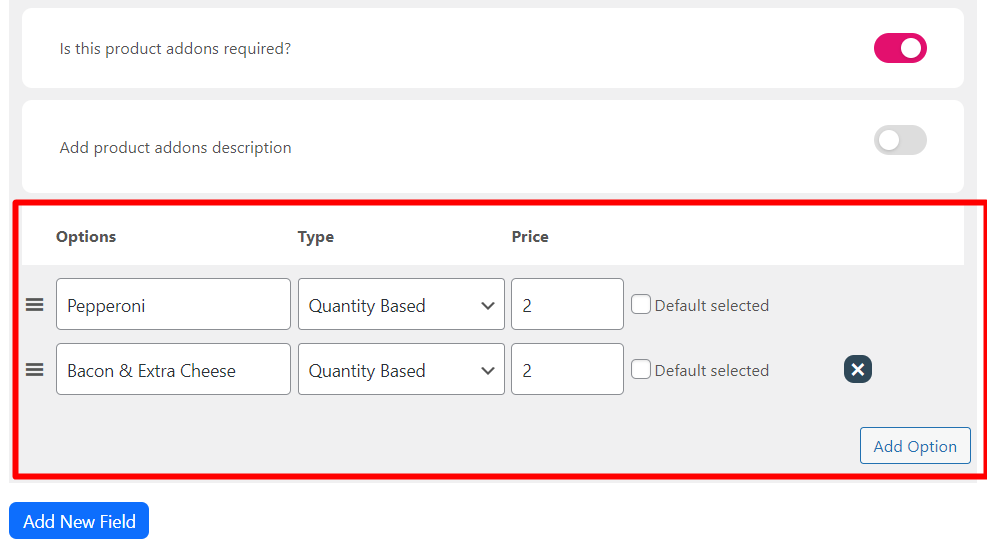
#3 Configure Product Add-ons:
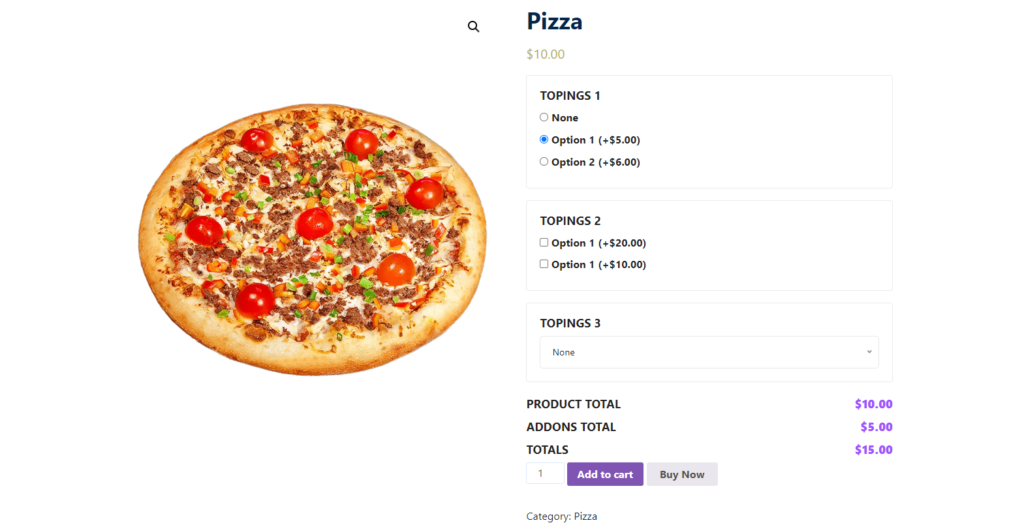
In the product edit page, scroll down to the Product Add-ons section made by Quicker. Now click Add New Add-on Group to define additional options (e.g., pizza toppings).
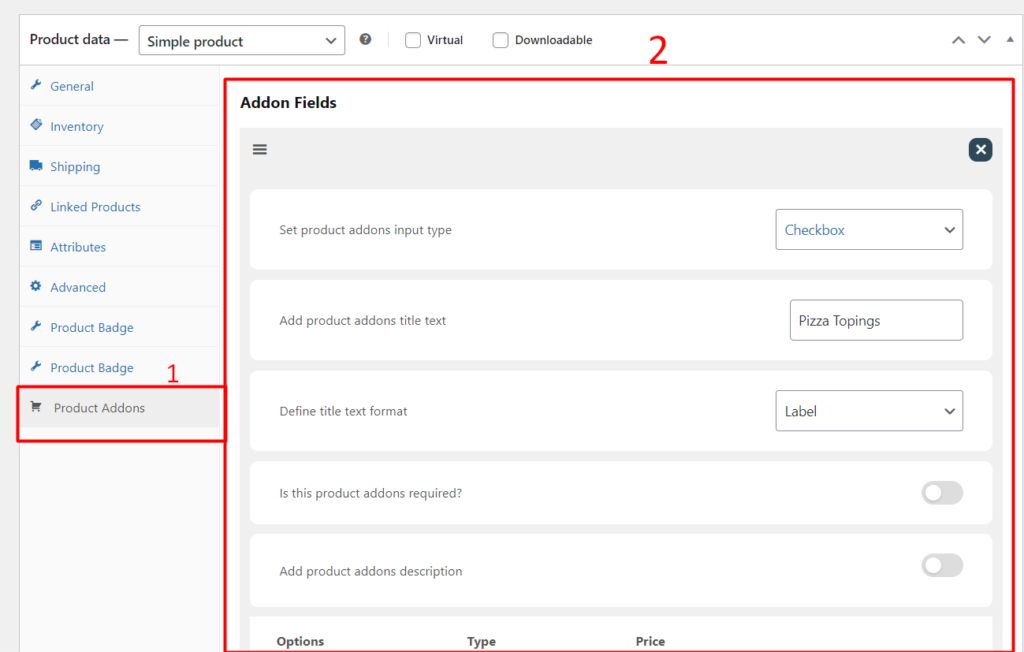
P.S. You can have up to 4 different add-on options for display input like checkbox, radio, dropdown, and long text.
#4 Set Add-on Options:
Now, define the type of add-ons (e.g., checkboxes for multiple toppings, radio buttons for sizes). You can add label names and prices for each option. For products like pizza, input different topping choices and their prices.
#5 Adjust Visibility and Conditions:
Now select if the add-on is required or optional. After that, set visibility based on user roles or conditions (like showing certain options for logged-in users).
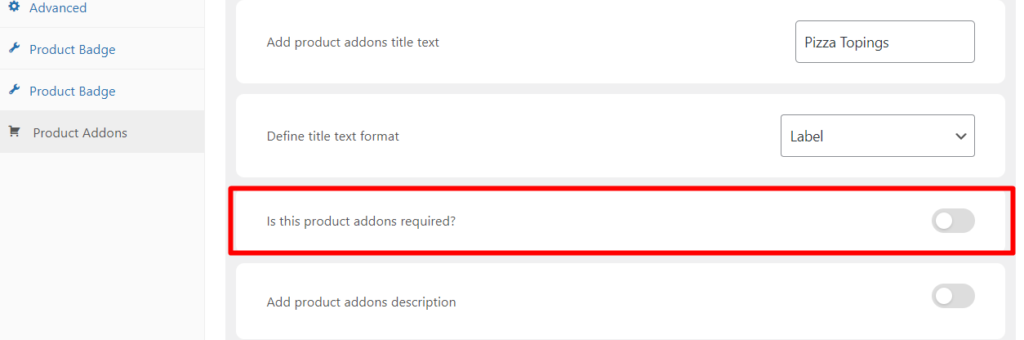
P.S: You can define titles up to 3 formats: Heading, Label or Hidden.
#6 Save and Hit Publish:
Once the add-ons are configured, click Save. You can publish the product when you’re ready to make it live.

#7 Review on Frontend:
Now in order to double-check, visit your store’s product page to verify that the add-ons appear correctly for the product.