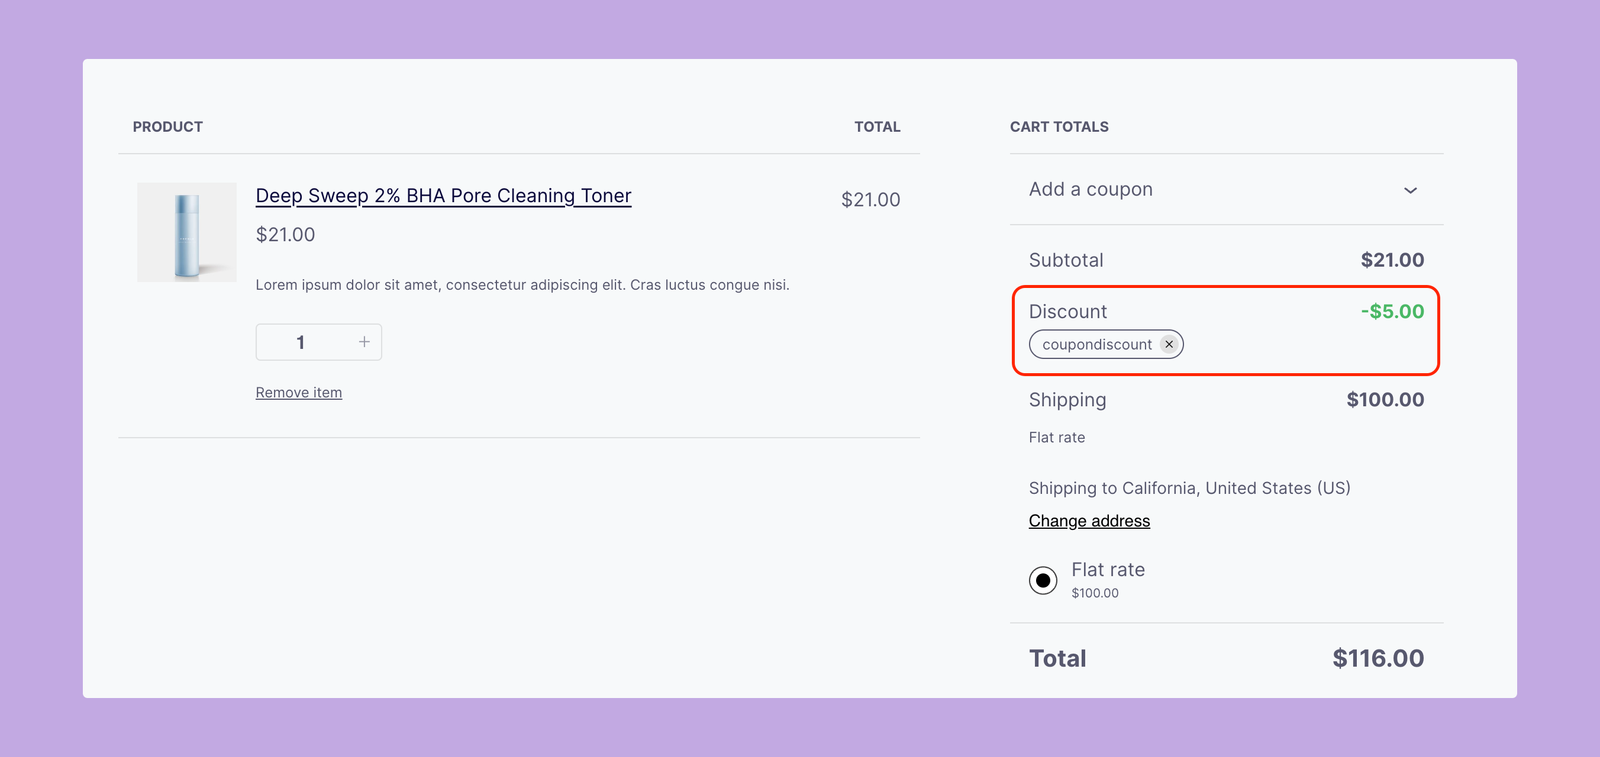
Offering discounts through coupon codes is a powerful strategy to attract new customers and reward existing ones. By using WooCommerce, along with the Discountify plugin, you can create and manage coupon code discounts that are easily applied at checkout. This documentation will guide you through the process of setting up and customizing coupon code discounts in your WooCommerce store.
Prerequisites
Before proceeding to the main documentation, make sure that you’ve installed and activated the following plugins:
| Note: This is a premium feature of Discountify. So, you must keep both the Discountify free version and the Discountify Pro plugin activated to use this feature. |
Step-by-step Process to Set Up Discounts Based on Coupon Codes
Here’s the overall process of creating and managing coupon code discounts:
Step 1: Navigate to WooCommerce Coupons Section
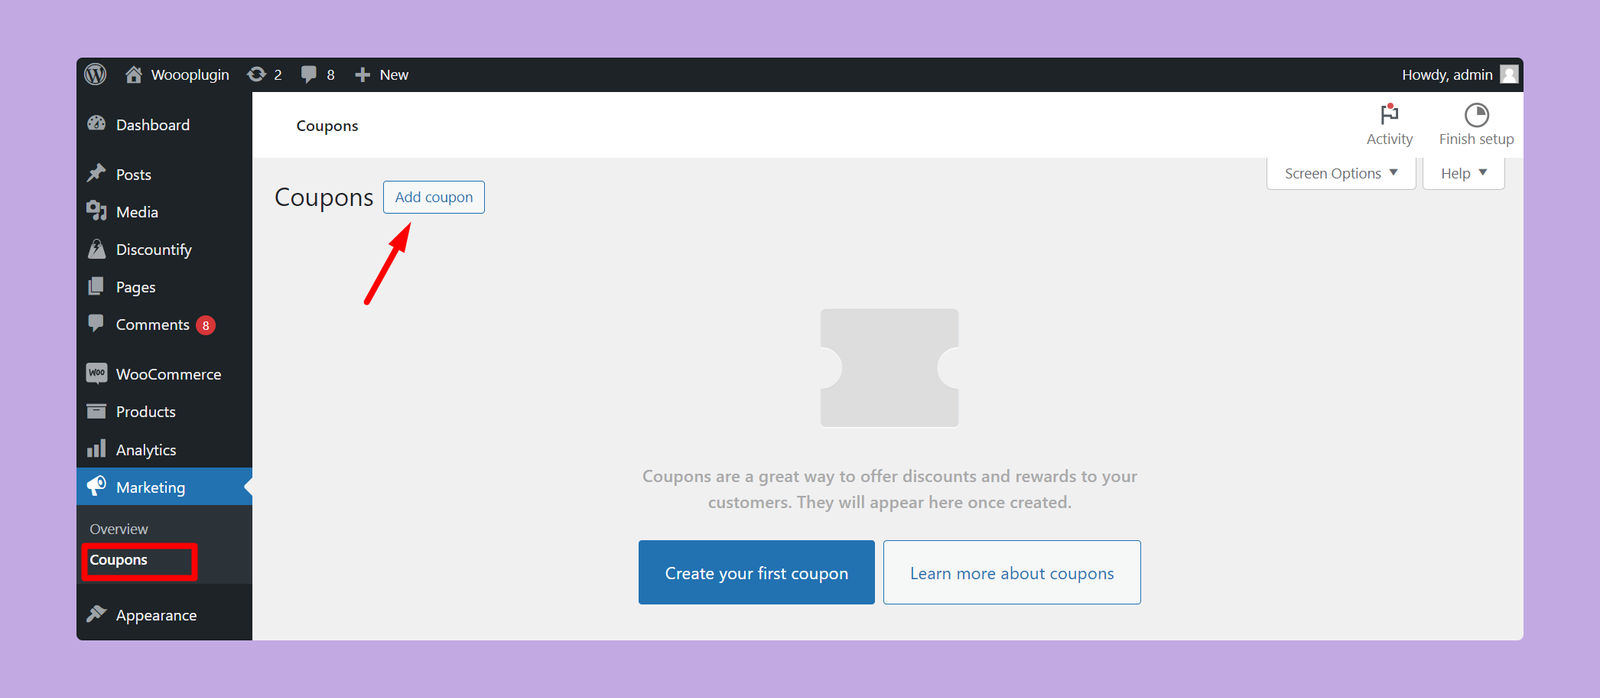
Login to your WordPress dashboard and go to Marketing > Coupons.
Step 2: Create a New Coupon
Click on Add Coupon to create a new coupon code. There, set a meaningful coupon code and enter the description. However, the description is optional. You can avoid it if you want.

Then, go to the Coupon data section and set the following options:
- Discount Type: Choose whether to apply a percentage discount, a fixed cart discount, or a fixed product discount.
- Coupon Amount: Enter the discount amount or percentage for the coupon.
- Allow Free Shipping: Check this box to offer free shipping.
- Coupon Expiry Date: Set the date when the coupon will expire and become invalid.
Step 3: Configure Coupon Discounts
Then, select the Discounts tab and fill out the necessary information.
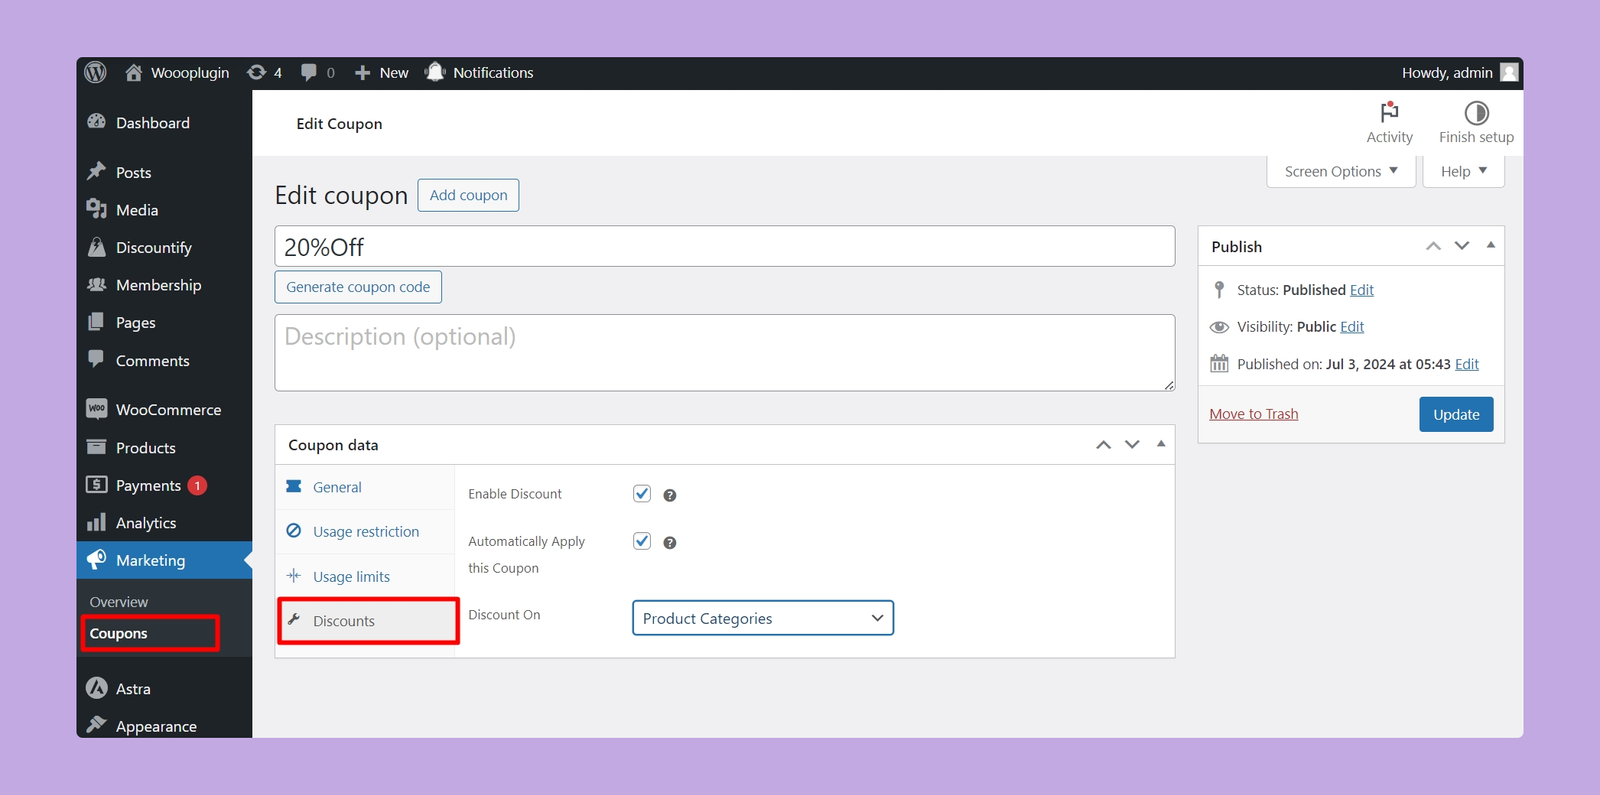
As you can see, you’ll get three options here. These are:
- Enable Discount: Check this box to enable the discount based on the customer’s purchase history or product categories.
- Automatically Apply this Coupon: Check this box if you want the coupon to be automatically applied to eligible customers. If you don’t check it, buyers have to manually input the coupon code on the checkout page.
- Discount On: Set whether you want to offer this discount for product categories, number of orders, or order amounts.
Step 4: Publish the Coupon
Once all the necessary information is filled out and configurations are set, click on the Publish button. It will publish and automatically activate the coupon for eligible buyers.
Discount on Product Categories
If you select the ‘Product Categories’ option from the Discounts settings, customers need to purchase products from specific categories. After choosing the options, you have to select the product categories too. You can choose unlimited product categories here.
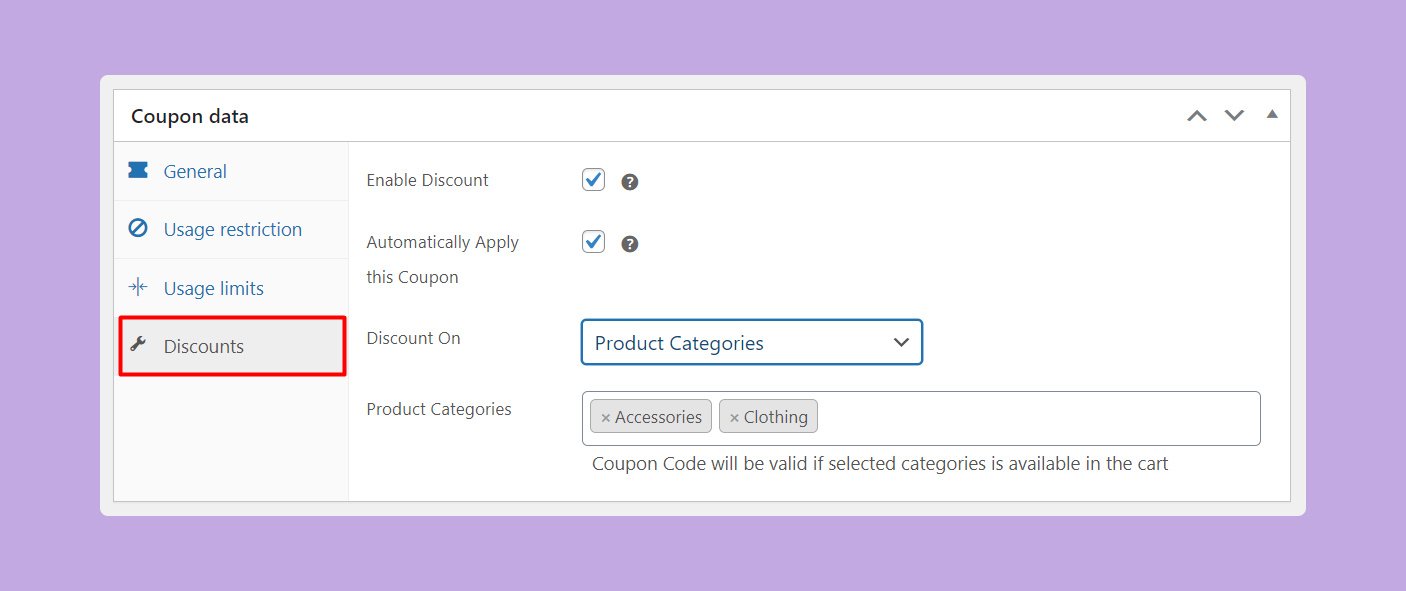
In this example, the selected categories are Accessories and Clothing. Once a customer adds items from these categories to their cart, a 20% discount will automatically appear on the cart page. This ensures that the discount only applies when the qualifying products are included.
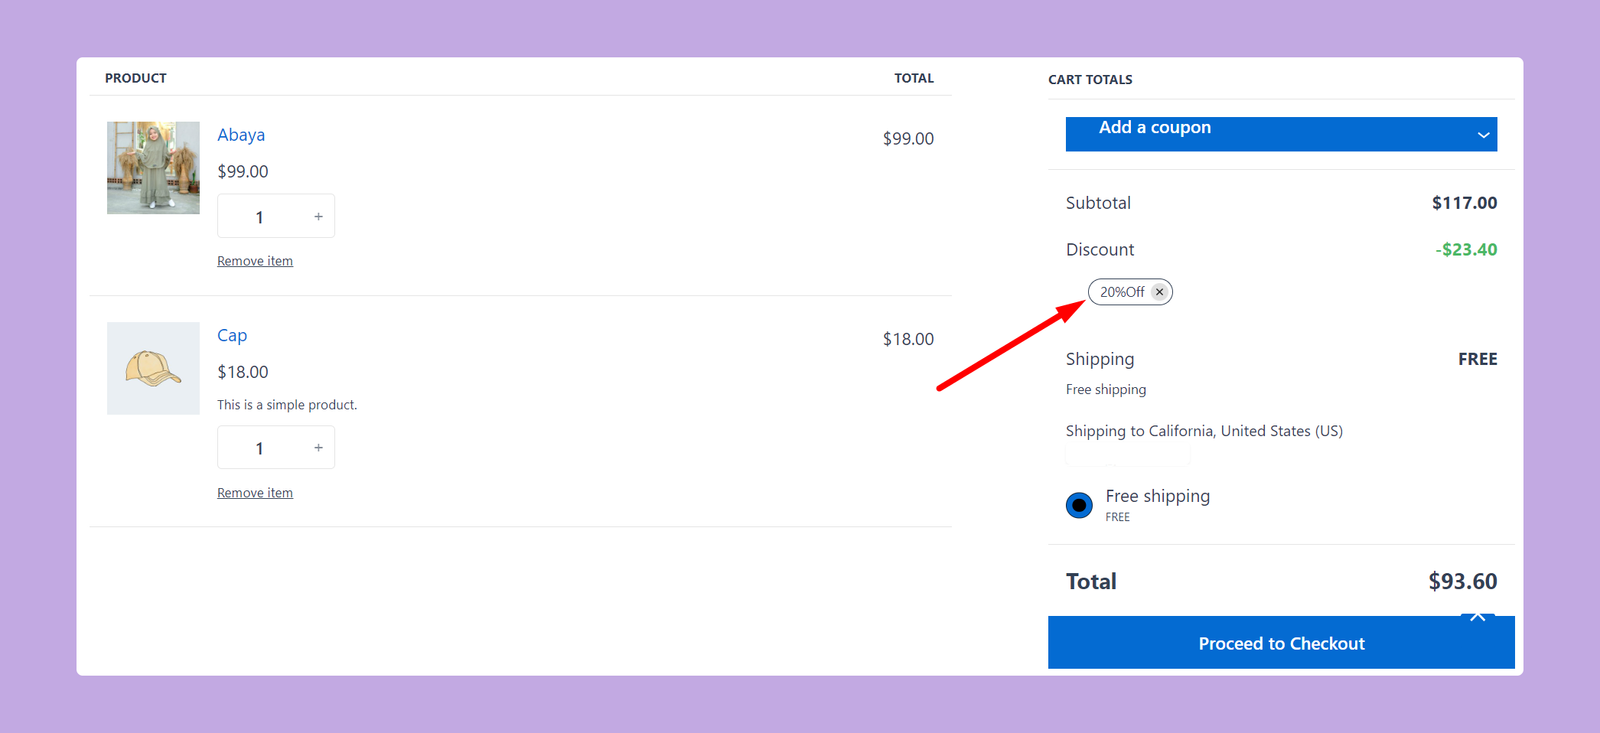
As you can see, I’ve added two different products from the selected categories. Thus, the discount has been automatically applied on the cart page.
Discount on Number of Orders
Offering a discount based on the number of orders is simple. It’s similar to setting up a first-order discount. Just set the “Previous No of Orders” in the Discounts settings. This tells the system how many orders a customer must have made to become eligible for using this specific coupon.
will receive the discount even if they have no purchase history So, this coupon code will be applied to their first order.
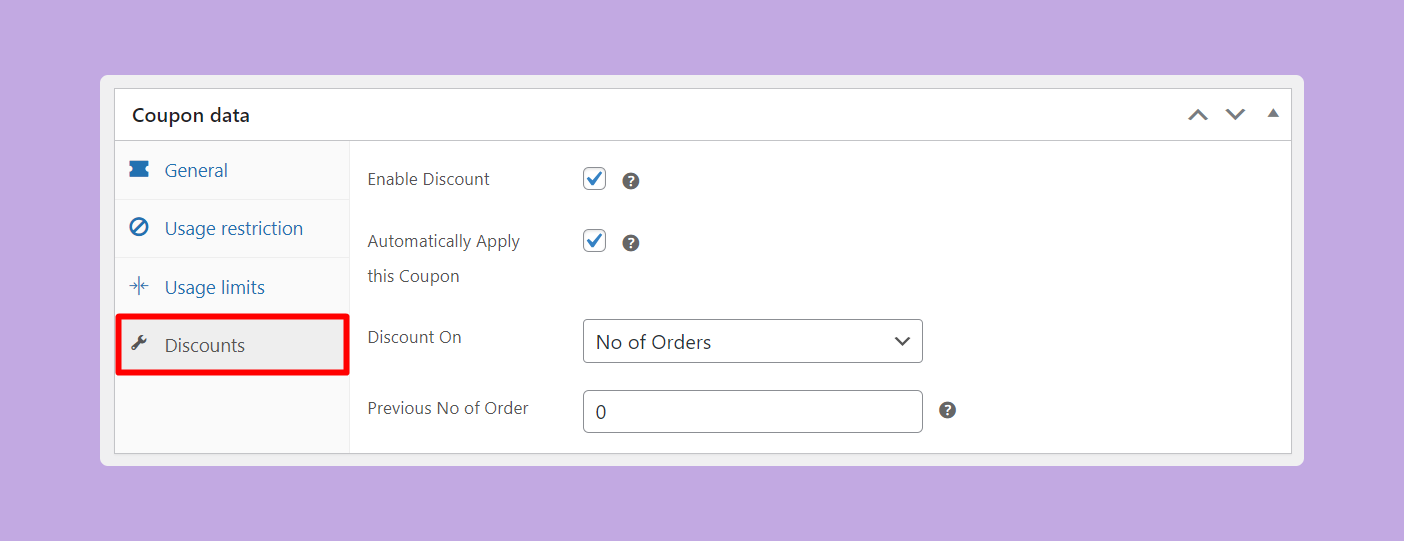
To offer a discount on the first order, set the “Previous No of Orders” value to 0.
Discount on Order Amount
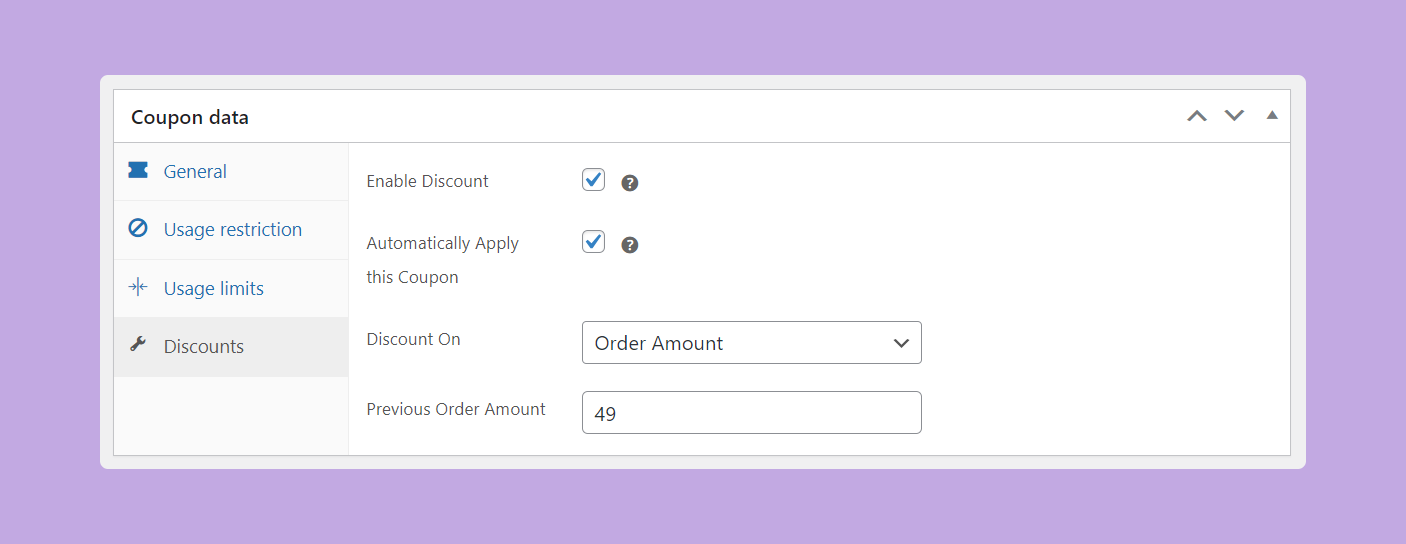
If you select the ‘Order Amount’ option from the Discounts settings, customers must meet a minimum order value to use the coupon. After choosing this option, you need to set the previous order amount. You can specify any order amount you prefer.
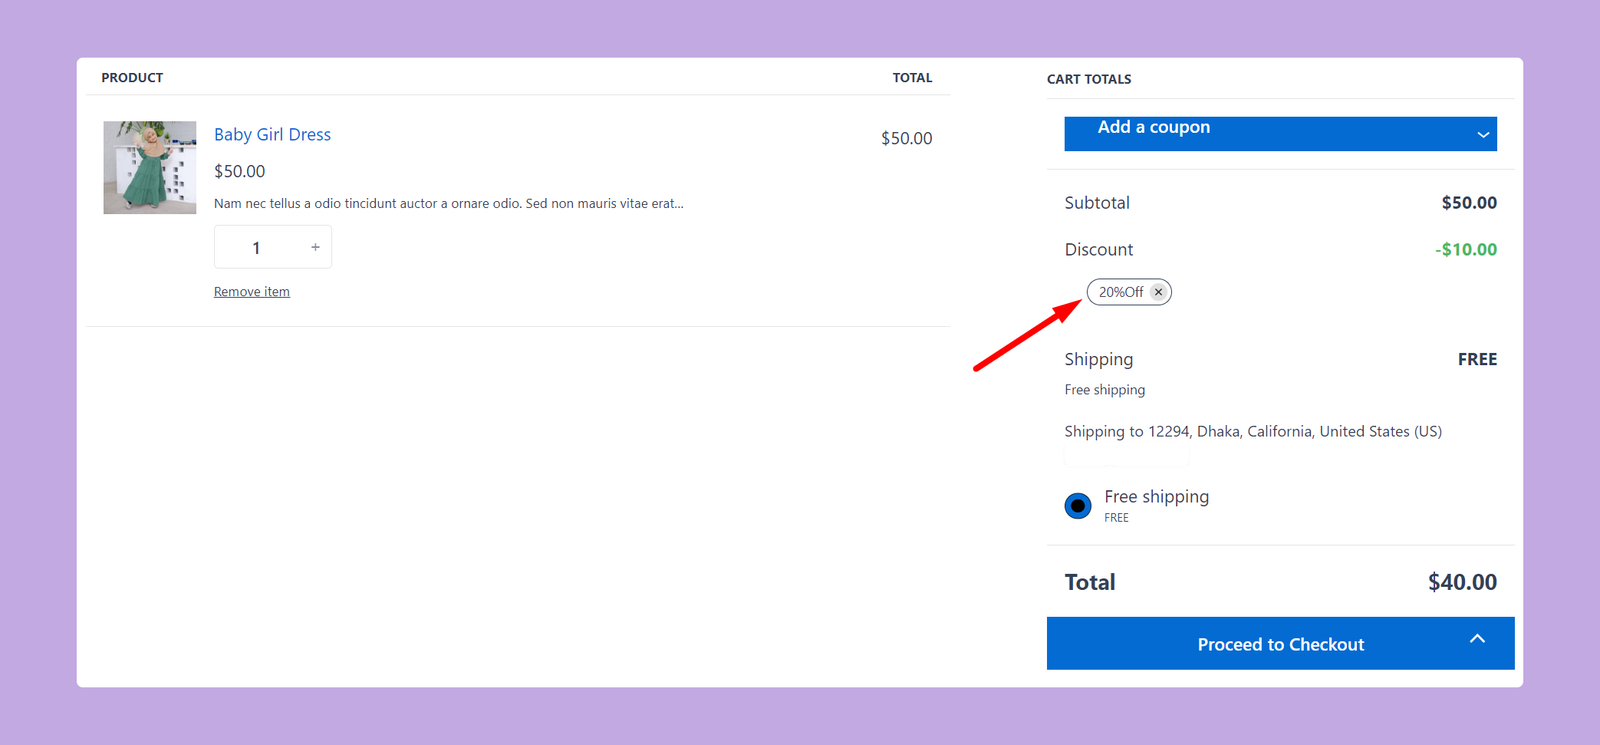
In this example, the previous order amount is set to $49. Once a customer purchases products more than $49, the discount will automatically appear on the next purchase cart page. This ensures that the discount only applies when the qualifying order value is met.
Here is the frontend preview of the discount:
Advanced Customization
You can customize coupon features further through the Usage Restriction and Usage Limits tabs. Let’s explore the options available on these tabs.
Usage Restriction

Here are the available options in the Usage restriction tab.
- Minimum Spend: Specify the minimum order amount required for the coupon to be valid.
- Maximum Spend: Set the maximum order amount for the coupon to be valid.
- Individual Use Only: Check this box to prevent the coupon from being used with other coupons.
- Exclude Sale Items: Check this box to prevent the coupon from applying to items that are already on sale.
- Products: Select the products where the coupon can be used, or that need to be in the cart for a “Fixed Cart Discount” to apply.
- Exclude Products: Select the products where the coupon cannot be used, or that cannot be in the cart for a “Fixed Cart Discount” to apply.
- Product Categories: Select the product categories where the coupon can be used.
- Exclude Categories: Select the product categories where the coupon cannot be used.Allowed Emails: List the billing email addresses that can use this coupon. Separate addresses with commas, or use an asterisk (*) to match parts of an email (e.g., *@gmail.com for all Gmail addresses).
Usage Limits
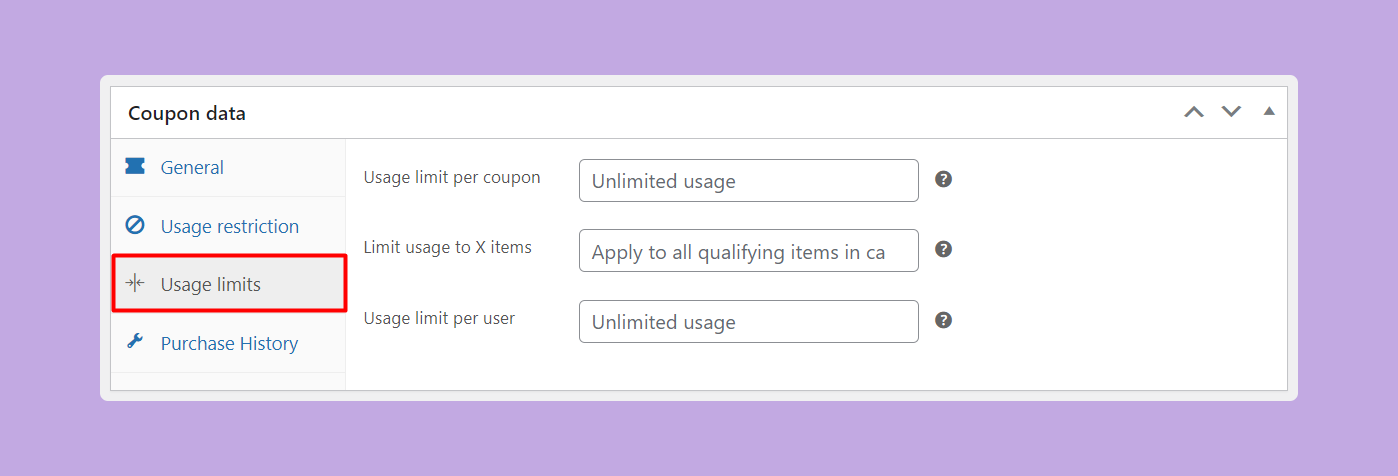
Here are the available options in the Usage Limit tab.
- Usage Limit per Coupon: Define how many times this coupon can be used in total. Leave it blank for unlimited usage.
- Limit usage to X items: Set the maximum number of individual items this coupon can apply to when using product discounts. You can leave it blank to apply to all qualifying items in the cart.
- Usage Limit per User: Set the maximum number of times a single user can use this coupon. Leave it blank for unlimited usage.
Example:
Suppose you want to create a discount coupon that will offer a $5 discount for 3rd order. To create this, set the following things:
- Discount type: Fixed cart discount
- Coupon amount: 5
- Previous Order: 2
To apply the coupon code automatically, enable the “Automatically Apply this Coupon” from the Purchase History tab.
