The Simple Discount feature in Discountify allows you to create a flat percentage-based or fixed-amount discount for your online store. Here’s the step-by-step process of creating a Simple Discount using Discountify.
Step 1: Access the Discount Rules Page
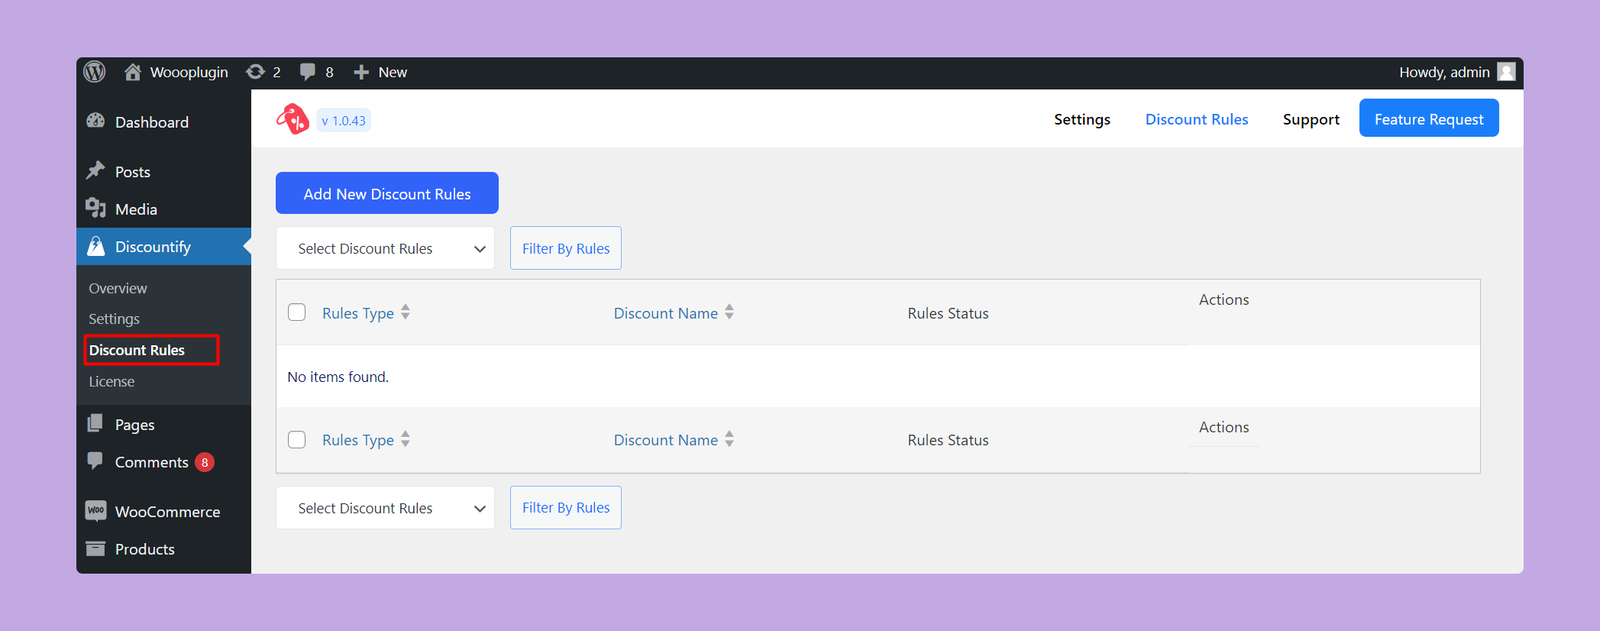
Login to your WordPress dashboard and click on the Discountify menu from the sidebar. Then, select the Discount Rules option. The Discount Rules page looks like below:

As you can see, there are no discount rules right now. But, if you’ve previously created any discount rule, you will get a list of those here.
Step 2: Create a New Discount
To create a new discount rule, click on the “Add New Discount Rules” button on the top.
Step 3: Configuring Discount Details

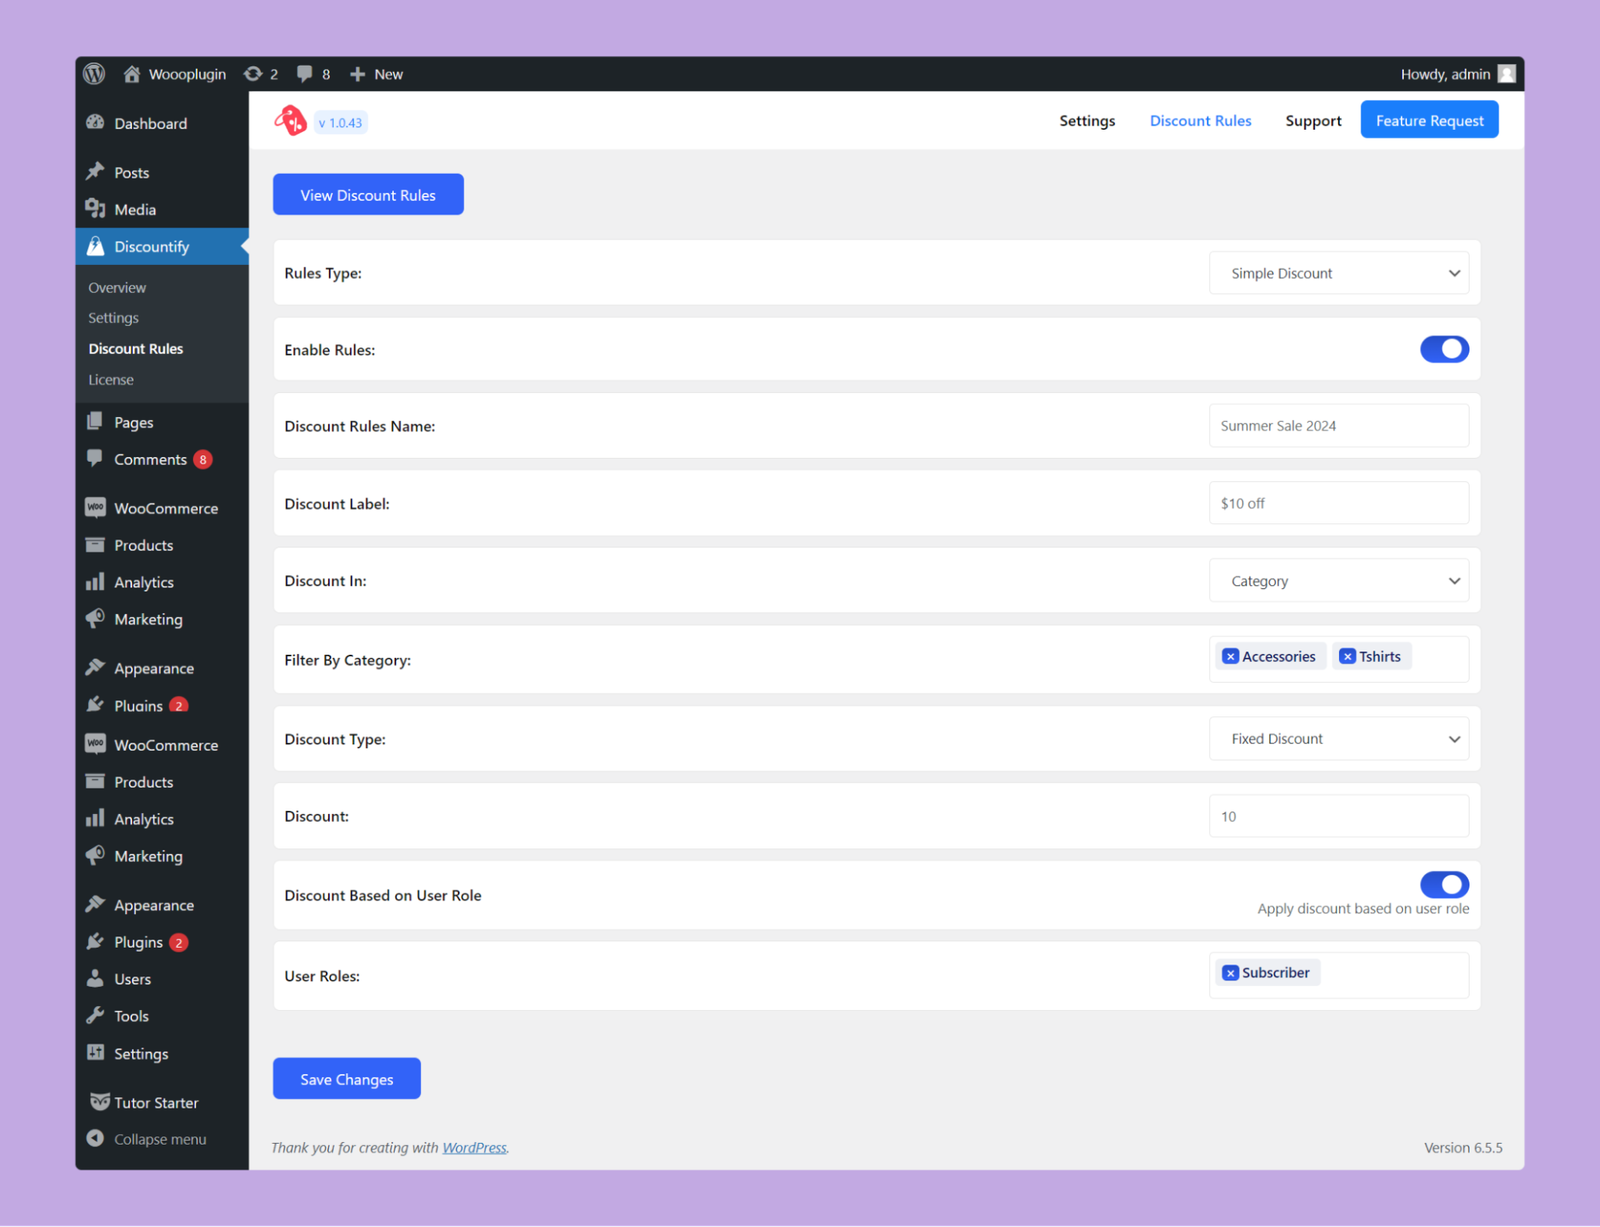
On this page, you have to configure the following options:
- Rules Type: Select the type of discount rules from the dropdown. So, you have to select Simple Discount here.
- Enable Rules: Use this toggle button to activate or deactivate this particular discount rule.
- Discount Rules Name: Enter a name for this simple discount.
- Discount Label: Define the label that will be displayed for the discount on the cart page.
- Discount In: Specify whether you want to offer this discount on specific products or categories.
- Filter By Product/Category: Choose the specific products or categories where you want to apply the discount.
- Discount Type: Select the type of discount, such as percentage or fixed amount.
- Discount: Enter the discount amount to be applied.
- Discount Based on User Role (Pro): Use this toggle button to enable or disable the user role based discount offers. If you enable this option, only the users with the selected roles can avail this discount.
- User Roles: Select the specific roles for whom you want to avail this discount.
Once you’ve setup everything, click on the Save Changes button below. That’s how you can create a simple discount using Discounitfy.
