Ultimate Membership lets you offer discounts to subscribers of specific members. Here is the step-by-step process of creating a subscription level by offering discounts for members.
Step #1: Access the Subscription List
At first login to your WordPress admin area and navigate to Membership > Subscriptions.
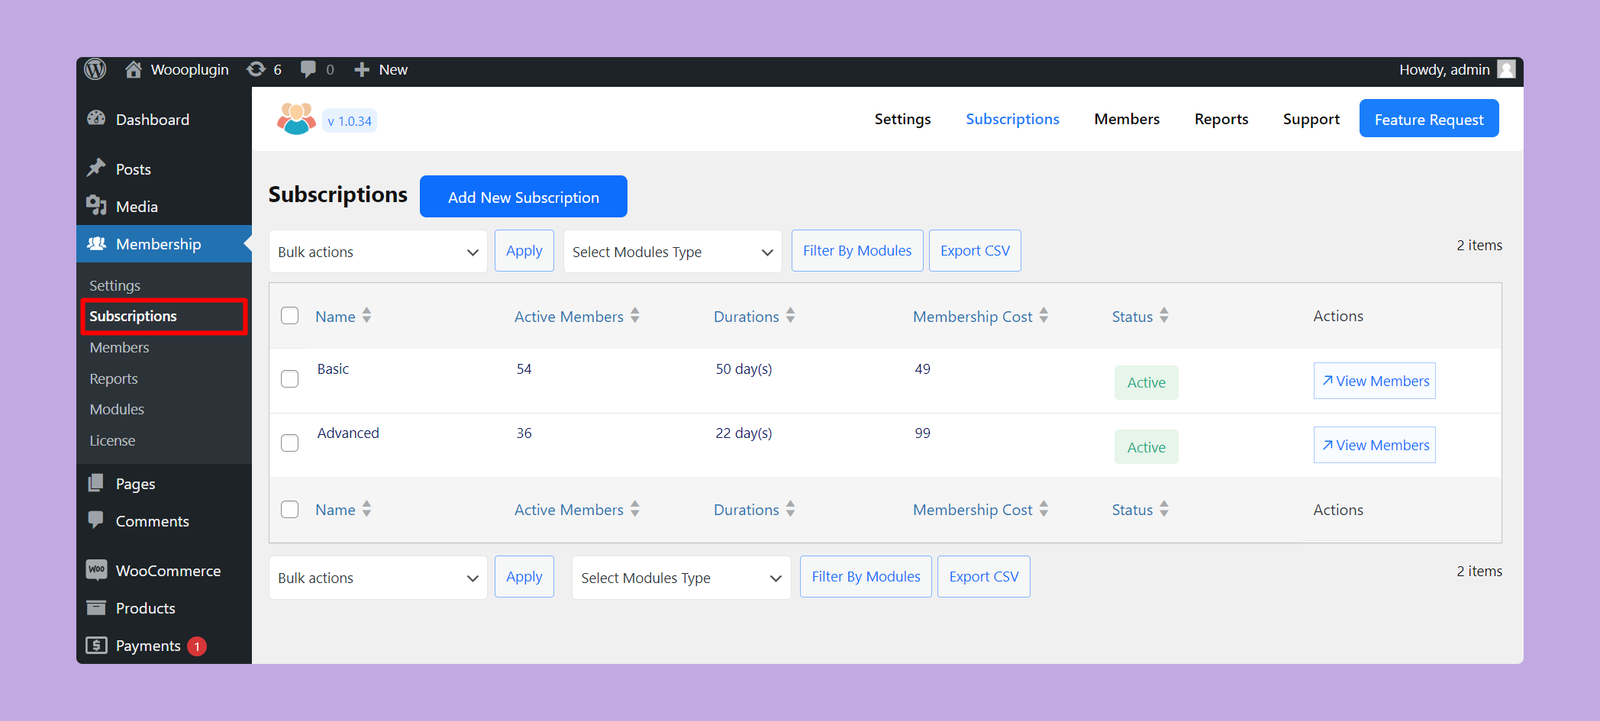
This is where you’ll get the list of all of your previously created subscriptions.
Step #2: Create a New Subscription Level
In the subscription list, click the ‘Add New Subscription’ button to create a new WooCommerce subscription plan. However, you can also offer discounts to the existing members. In that case, hover over the current subscription plan and click the “Edit” option.
If you need help creating a membership plan, check out our detailed tutorial on How to Create a Subscription Label for WooCommerce.
Step #3: Set Up Product Discounts
While creating or modifying WooCommerce subscriptions, scroll down to locate the Product Discount Section. You must set up the discount from here.
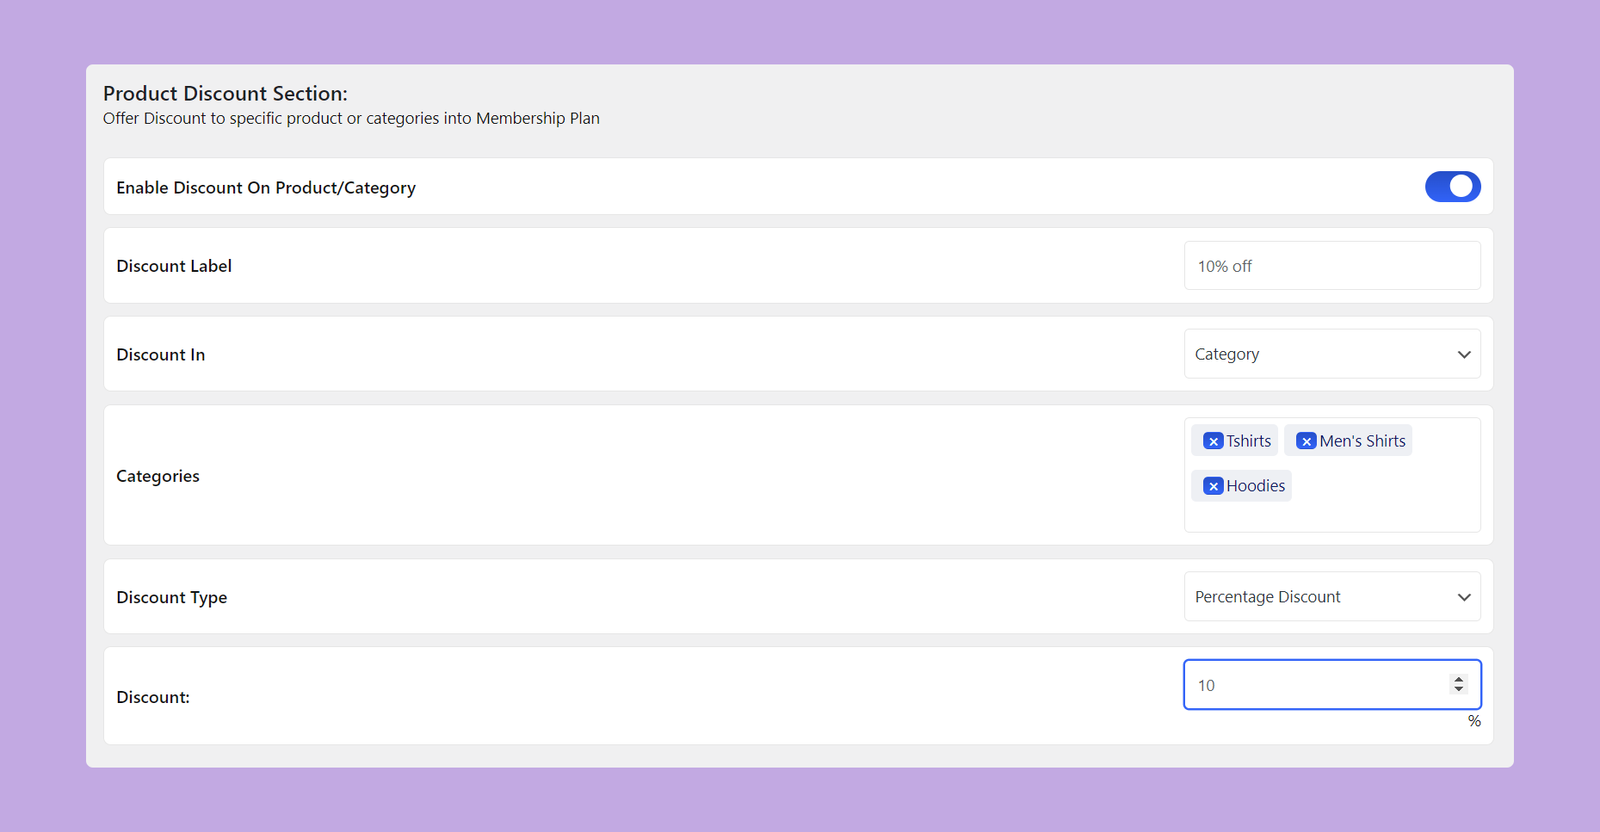
The available options in this section are:
- Enable Discount On Product/Category: Toggle this switch to enable or disable discounts for products or categories.
- Discount Label: Enter a label for the discount. For example, we’ve used “10% off. here”
- Discount In: Select whether the discount applies to a product or category.
- Product: If you select “Product,” you can choose specific products on which the discount will be applied.
- Category: If you select “Category,” you can choose specific categories on which the discount will be applied automatically. We’ve selected the Category option from here. So, we have to choose the categories in the next field.
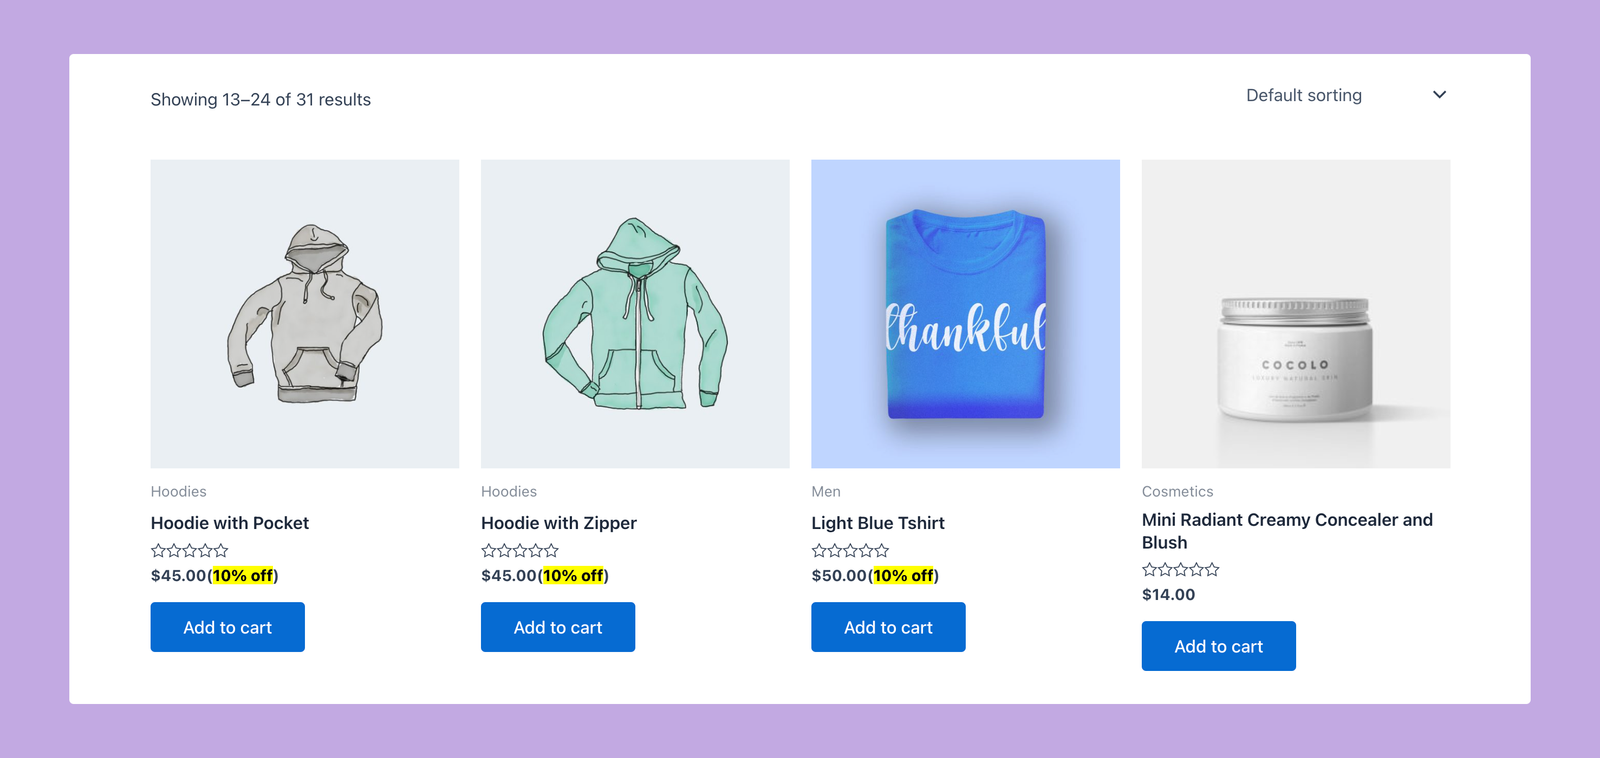
- Categories: Select the categories to which the discount applies. Here, we’ve selected three different categories. These are ‘T-shirts’, ‘Men’s Shirts’, and ‘Hoodies’.
- Discount Type: Choose whether you want to offer a fixed or percentage discount. Here, we’ve selected the ‘Percentage Discount’ option.
- Discount: Enter the numerical value of the discount.
Step #4: Set Up Cart Discounts
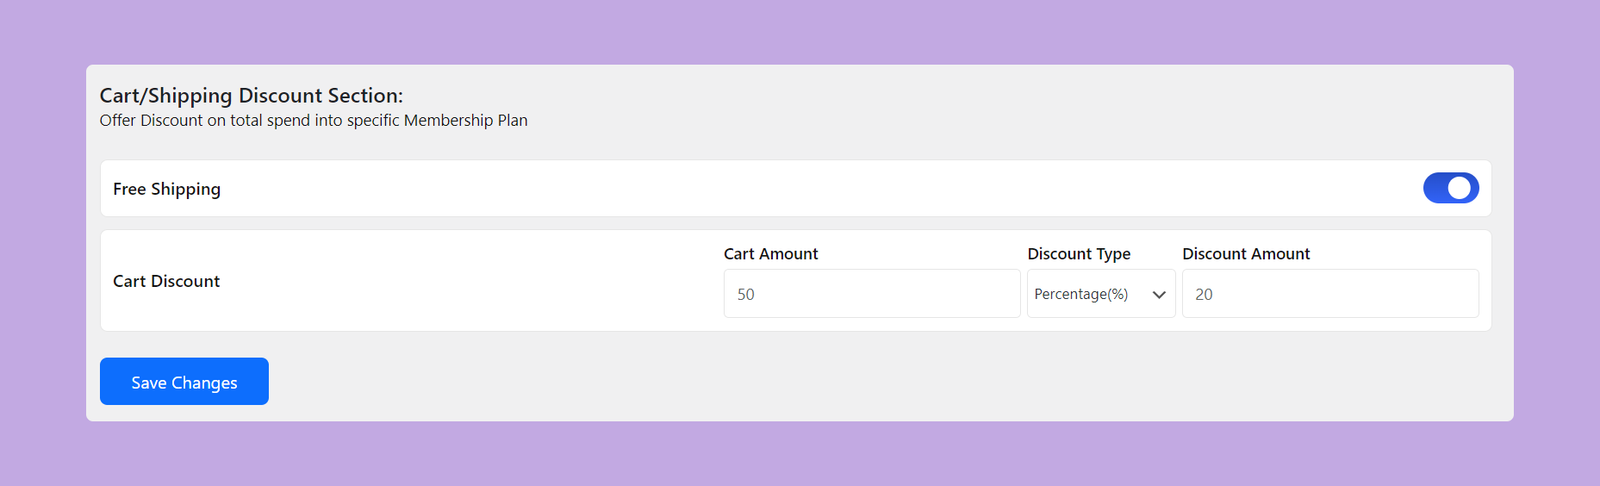
If you want to offer discounts based on the cart amount, you have to configure it here. In this section, you’ll need to input the following options:
- Free Shipping: Toggle this switch to enable or disable discounts for the members.
- Cart Discount: To become eligible for this discount, input the minimum cart amount, set the discount type, and input the discount amount.
That’s how you can add discounts for the members of a special group.
Frontend Preview of Product Discount
In the previous step, we have created a 10% discount offer for the T-shirts, Men’s Shirts, and Hoodies categories. So, if we visit the shop page, the discount label will be visible like this:
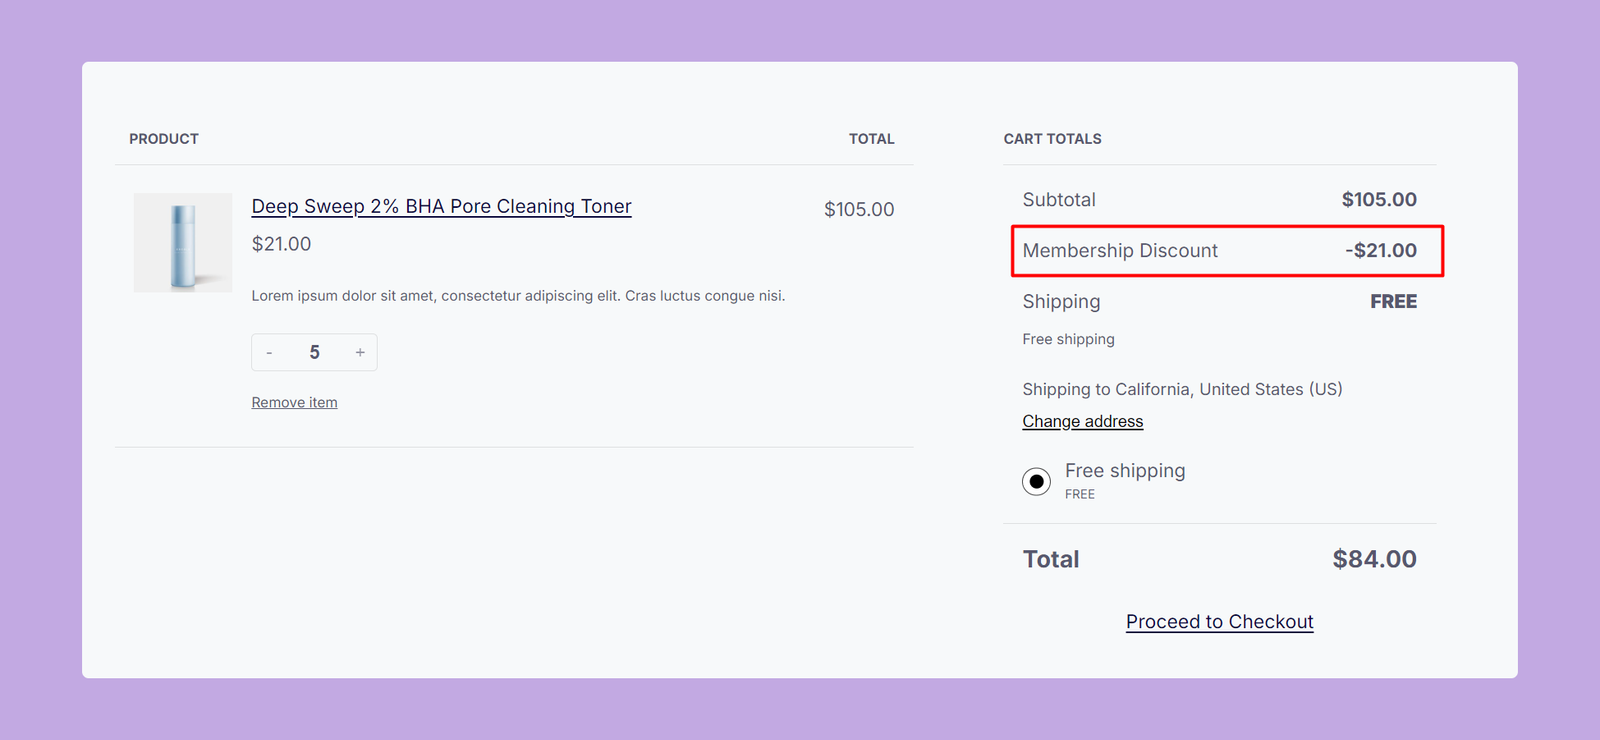
Frontend Preview of Cart Discount
For cart discounts, we’ve set the condition that users will receive a 20% discount on purchases of $50 or more. Once this condition is met, the cart will appear as follows: