The Ultimate Membership has a unique feature that allows you to restrict product pricing visibility to specific membership levels. It ensures that only members of a certain tier can view the prices of designated products.
In this guide, we’ll walk you through the steps to configure member-only pricing using the Ultimate Membership plugin. Follow these instructions to set it up:
Step #1: Go to General Settings
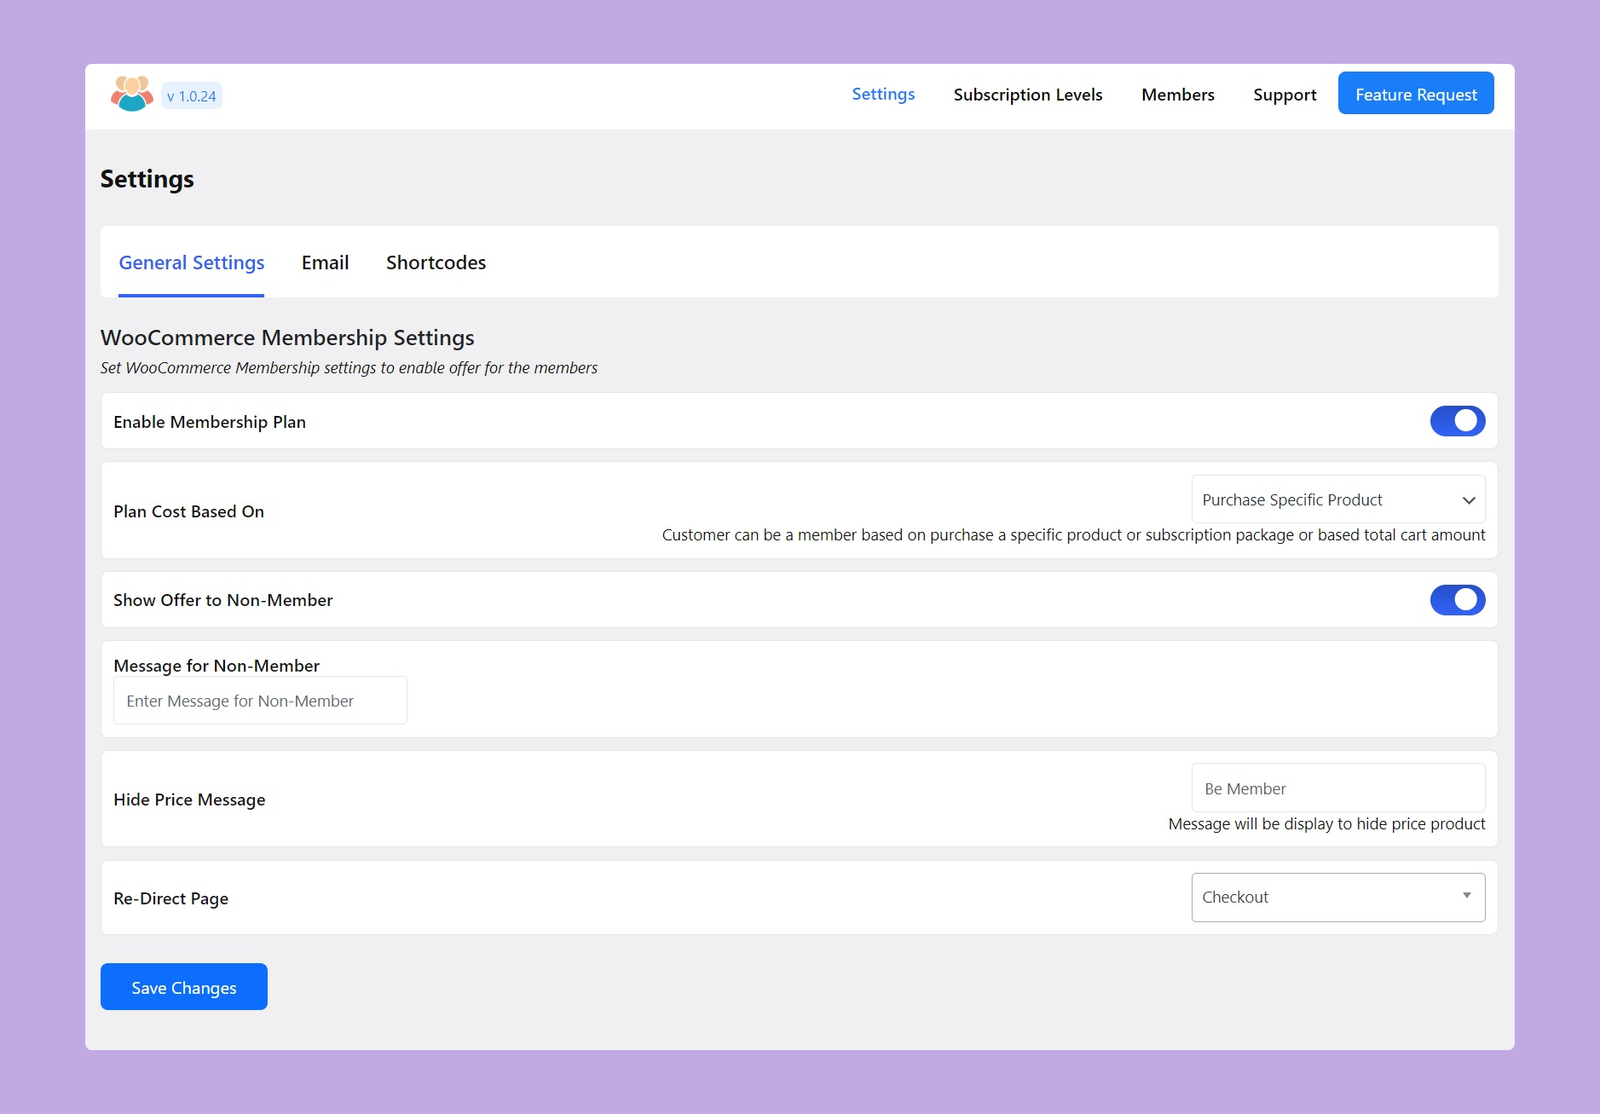
Log in to your WordPress dashboard and navigate to the Membership > Settings page.
Step #2: Set Messages
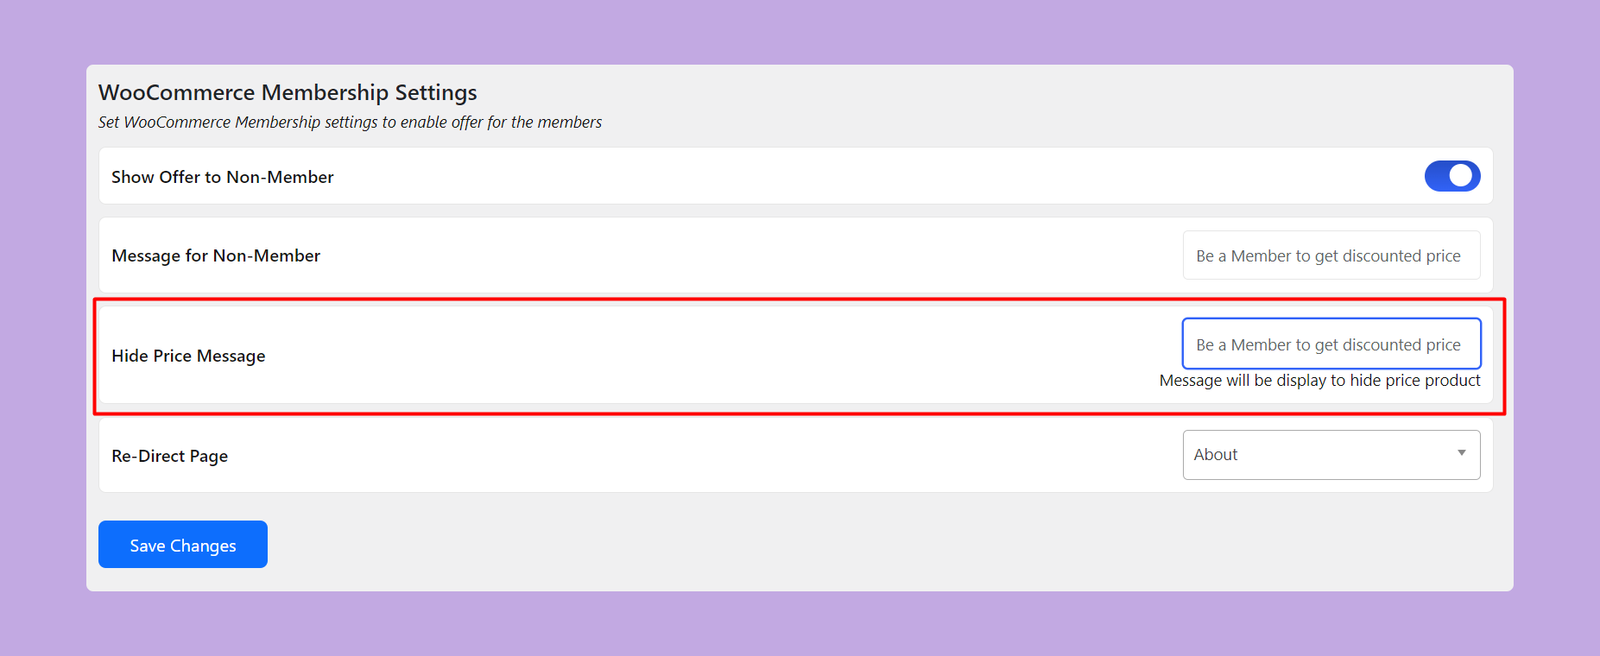
Now, scroll down a little bit and there you will get the ‘Hide Price Message‘ option. This option is available under the ‘WooCommerce Membership Settings’ section. From there, you can customize the message displayed to both members and non-members. For non-members, set a specific message that will appear in place of the product price.
Step #3: Add New Subscription
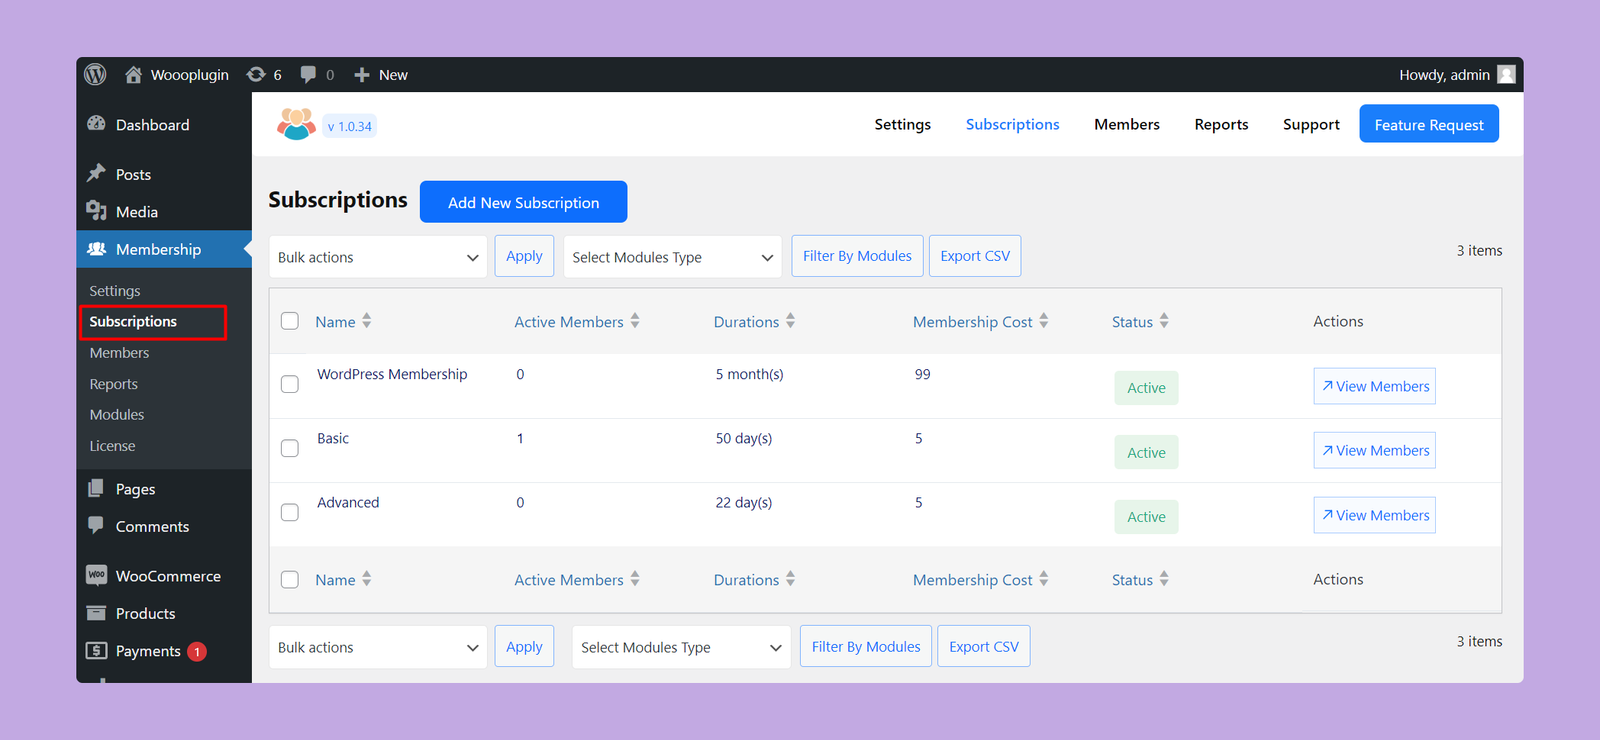
In this step, you have to create a new subscription label. Go to Membership > Subscription, and you’ll get the list of your existing subscription plans. You can either edit your existing plan or create a new one by clicking on the ‘Add New Subscription’ button.
Step #4: Configure Member-Only Pricing
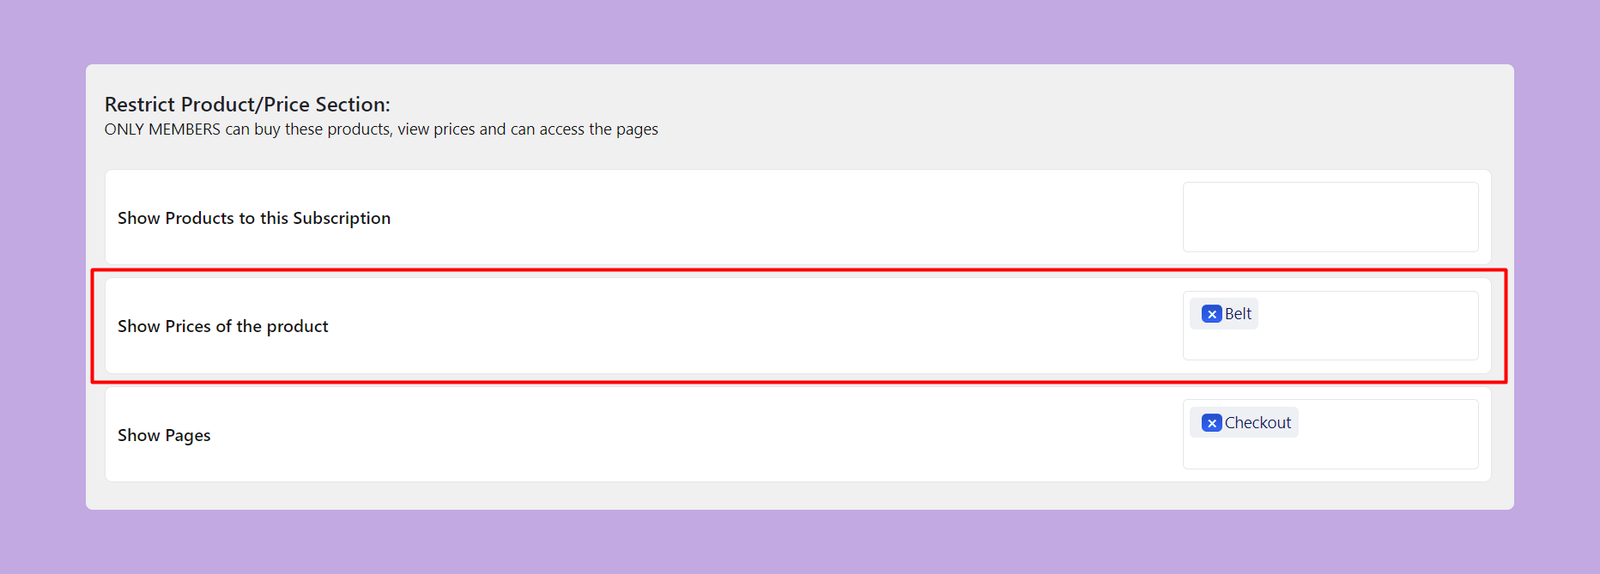
In the subscription settings, find the Restrict Product/Price Section. There, you’ll get an option called ‘Show Prices of the Product’. From here, select the product where you want to display the message by hiding the product price.
You’ll be presented with a list of products. From this list, choose the products for which you want to limit price visibility to members only.
Frontend Preview
Here’s the frontend preview of the pricing message for the non-members:
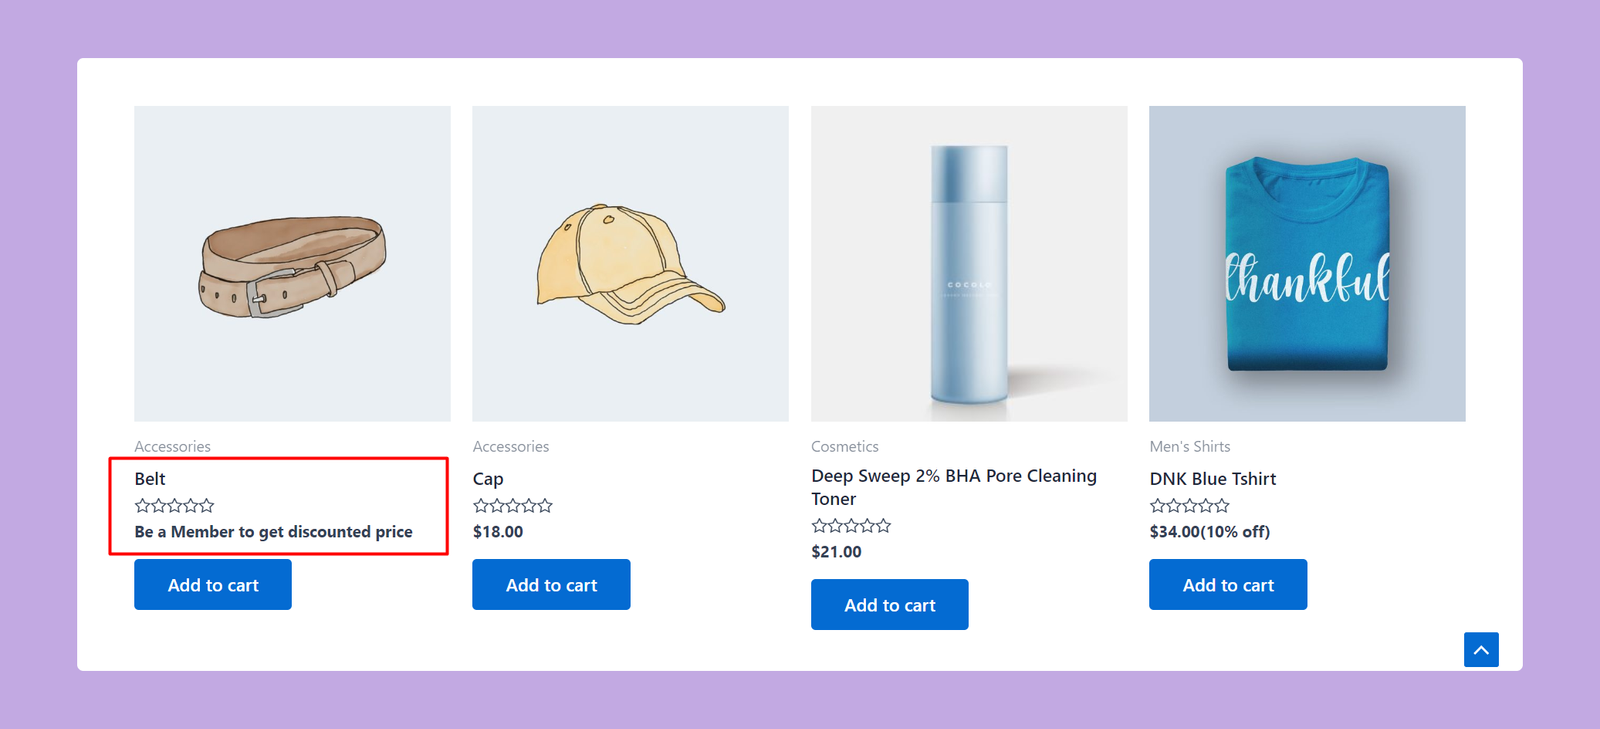
By following these steps, you can effectively manage product pricing visibility based on membership levels. It will enhance the value of your membership plans and create a more exclusive experience for your members.
